OK, I did it again! ;-) In the following there are the instructions to build natively GnuPG 1.x for Win64 using MSYS2 and MinGW-w64. The FINAL version of the old (and more detailed) instructions to build for Win32 using MinGW/MSYS can be found here.
These instructions are not very detailed, first of all because I am too lazy ;-), but also because the details of the procedure may change without notice with any new version of any of the involved packages. These instructions must therefore be taken as a general scheme that may need some adjustments.
1.1) Go to the website https://msys2.github.io/ and download the last version of the installer (msys2-x86_64-20160205.exe now when I am writing).
1.2) Start the installer (for detailed instructions, look at this link), setting the destination to a folder with no spaces in the name (the default "C:\msys64" is perfect).
1.3) You should have three new icons in the start menu. Run "MSYS2 Shell".
1.4) Run the following commands and follow the instructions (in particular when it asks you to brutally close the window and then open it again):
a) update-core (close the window when it asks so, and open it again).
b) pacman -Syuu (close the window when it asks so, and open it again).
c) pacman -Syuu (repeat many times, closing and reopening the window after each one, until there are no more updates).
d) pacman -S base-devel
e) pacman -S mingw-w64-x86_64-toolchain
f) pacman -S mingw-w64-x86_64-curl
1.5) Close everything and open again using this time the icon "MinGW-w64 Win64 Shell". If during the above procedure many prompt command windows were opened, you can close them.
Before starting the compilation, a small fix to GnuPG sources is required if you want to perform the checks.
2.1) If you have not yet done so, download the GnuPG 1.4.20 source (of course from http://www.gnupg.org). In the MSYS folder, there is a subfolder named "home", with another subfolder named after your user name. You have to unpack GnuPG sources inside this last folder, with all the directory structure of the compressed file. If everything is OK, you will have another subfolder named "gnupg-1.4.20" with all the sources inside.
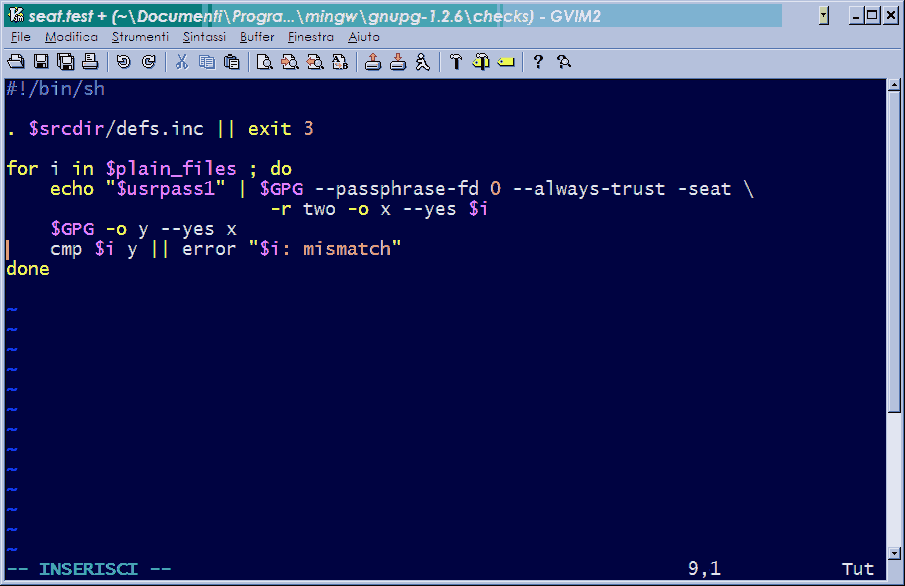
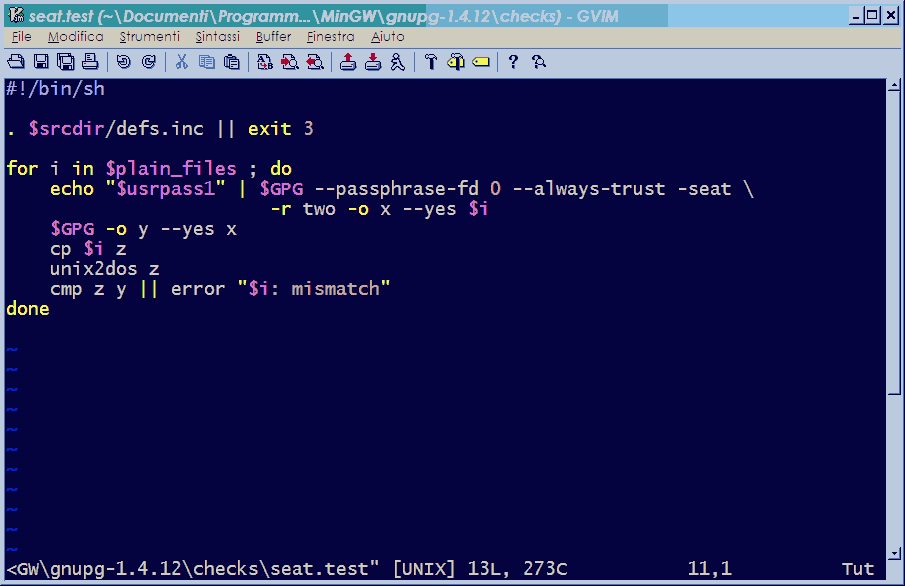
2.2) If you want to be able to perform the checks, open the file "seat.test" in the "checks" subfolder and go to line 9.
Change "$i y" into "z y" and add just before line 9 two new lines with the following commands: "cp $i z" and "unix2dos z". Save and close the file.
2.3) If you want, and ONLY if you know VERY WELL what you are doing, you can make a small change to the GnuPG source code to enable the creation of keys longer than 8192 bits. Such keys can be used by GnuPG, but their creation is disabled by default. Following NIST guidelines, a strength equivalent to a symmetric cipher with a 128 bit key (like AES-128) is provided by a RSA key with a length of 3072 bits. A strength equivalent to a symmetric cipher with a 256 bit key (like AES-256) is instead provided by a RSA key with a length of about 15000 bits. On this topic see also this page on Wikipedia. In other words, if one is using symmetric ciphers with 128 bit keys the limit of 4096 bits for the RSA keys is more than enough. However, if one is using symmetric ciphers with 256 bit keys it may be useful to create larger RSA keys. The modification to GnuPG sources is described on this page. To make it short, open the file "configure", go to line 5079 and change "65536" into "131072". Save and close the file. Then open the file "keygen.c", in the "g10" subfolder, go to line 1044 and change "4096" into "16384", go to line 1045 and change "4096" into "16384", go to line 1254 and change "8192" into "16384", go to line 1581 and change "4096" into "16384". Save and close the file. Pay attention that for this change you are on your own, with all possible problems and incompatibilities.
3.1) Now insert the following commands at the MSYS prompt, which has been freshly started using the "MinGW-w64 Win64 Shell" icon:
a) cd gnupg-1.4.20
b) CFLAGS='insert here your preferred flags, see GCC manual for details'
LDFLAGS='-s -static' ./configure --enable-large-secmem --enable-camellia --with-included-zlib --with-included-gettext --with-included-regex --build=x86_64-w64-mingw32 (this last "32" is NOT a typo)
c) make
d) make check
This last one is not a mandatory step, but it is useful to check the everything
went right and that the newly built GnuPG works perfectly.
3.2) If everything went well without any errors, then you will find gpg.exe and gpgv.exe in the g10 subfolder, gpgkeys_hkp.exe, gpgkeys_ldap.exe, gpgkeys_finger.exe and gpgkeys_curl.exe in the keyserver subfolder and gpgsplit.exe in the tools subfolder. Now you can copy them in another folder (e.g. C:\GnuPG). Copy there also the file libiconv-2.dll which can be found in C:\msys64\mingw64\bin changing its name in "iconv.dll". You can now follow the standard GnuPG installation procedure, described in the README-W32.txt file, creating the required registry keys.
![]()
![]()
![]()
![]()
![]()
![]()
![]()
![]()
![]()
![]()
![]()
![]()
![]()
![]()
![]()
![]()
![]()
![]()
![]()
![]()
![]()
![]()
![]()
![]()
![]()
![]()
![]()
![]()
![]()
![]()
![]()
![]()
![]()
![]()